sponsor

sponsor

Slider

Videos

Vape Kits

Deals

Vape Tanks

Vape Mods

Giveaway

New Arrive

Aspire Veynom EX Kit is Running On!

 Hey Friends, Aspire Veynom EX Kit has been launched newly by Aspire. If you wanna update your device recently, I believe it will meet your requirement. Let me introduce this new star to you. 

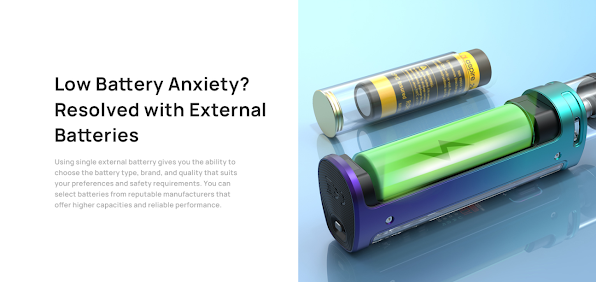
Aspire Veynom EX Kit is powered by an external 18650/20700/21700 battery with Type-C 2A charging and 1-100W adjustable output. 

Meanwhile, it features adjustable airflow system, which allows you to adjust your ideal airflow by rotating the pod. 

It also equipped with adjustable 6 lighting effects and the 0.96'' colorful screen to provide you more fun. 

What's more, its 6 output modes are designed to meet your different vaping needs: AUTO, WATT, VOLTAGE, BYPASS, CPS, and TC-NI / TC-TI / TC-SS. In addition, the kit adopts Screw-to-open Top Fill, which can keep you away from the leakage issue.

The Package of Aspire Veynom EX Kit Includes
✔1x Veynom EX Device
✔1x Veynom Pod 5.0ml
✔1x BP Meshed Coil 0.15Ω (60-80W, Pre-installed)
✔1x BP Meshed Coil 0.3Ω (30-40W)
✔1x Type-C Cable
✔1x User Manual

COUPON CODE: JUL12, *Ends Jul.31st

Just Look the Aspire BP60 Pod Kit


With an amazing appearance, Aspire BP60 Pod Kit has black, navy, golden flame, red starry sky, and red honeycomb for your options.

Powered by built-in 1400mAh battery, Aspire BP60 Pod Kit can fire up to 60W. Also, it comes with a fast 2 amp type-C USB charging system. Featuring automatic mode, the BP60 Pod can read the coil's resistance and automatically set the device to the ideal wattage. The 0.96-inch color screen can display relevant information.

The BP60 Pod is a 5ml side filled pod, which can accommodate a 0.3ohm Mesh Coil or 0.6ohm Dual Coil for MTL or DL vaping.

You may also like Voopoo ARGUS Air Pod Kit

Take the Super Cost-efficient Pod Kit! Aspire Minican Kit

Very glad to introduce the Aspire Minican Kit. Made with top-grade rubber paint, it features a perfect grip and comfortable hand feeling. 

Powered by 350mAh built-in battery, Minican comes with multiple safety protection, such as vaping overt time protection, short circuit protection, overheat protection, and over-discharge protection. With auto-draw technology, you can just take a puff to fire it up.

The Minican pod equips 2ml capacity and has a bottom fill port. There is a 1.2ohm mesh coil to provide massive vapor and richer flavor. 

You may also like Aspire Cloudflask Kit

A New Style Coil for a New Style of Vaping!

Recently, Aspire has launched the Breeze NXT Pod Kit with new style coil. The Breeze NXT mesh coil is a brand new coil, exclusive to the Breeze NXT, a 'push-fit' mesh coil with superior wicking capabilities.

Powered by 1000mAh battery with 5.4ml tank capacity, Breeze NXT Pod Kit uses the proprietary coils to vaporize today's most popular e-juice or nicotine salts. The side adjustable airflow allows the desired airflow to be selected across the internal coil structure to extract and develop the complex flavors. Breeze NXT adopts the single firing button, which can be used to activate the firing mechanism but is also geared with a draw-activated mechanism, unlocking the various ways that the vape can be used.

The exterior chassis crafted is made by durable zinc-alloy. The easy side filling design makes the filling easier. Multiple protections ensure a safe and stable vaping experience for you.

By the way, there is good news for all of you, Breeze NXT Pod Kit now is only $27.93 at Cloumix.com. Just login for the discount!

You may also like $12.88 Vaporesso ORCA Solo Kit

New Product! Aspire K Lite Kit 900mAh & 2ml

Hi friends, recently Aspire has launched the very portable K Lite Kit with sleek minimalist design. It is very fitted as easily in the purse as it does in the hand. Powered by 900mAh built-in battery, which meets your whole day vaping need. K Lite Kit uses Micro USB Charging port. Multiple protection ensures a safety vaping experience for you.

Two Coils For Your Options

Featuring 1.8ohm and 1.6ohm coils, K Lite Tank gives you a wonderful MTL vaping experience. Also, the 1.8ohm and 1.6ohm coils are compatible with Aspire original BVC coils and Spryte coils.


Five Voltages Level For Your Options


Many thanks for your watch. If you have any suggestion or question, please feel free comment here.


[New Arrival] Aspire AVP AIO Starter Kit 700mAh

Aspire has introduced a new AIO Kit.The Aspire AVP AIO Starter Kit adopted an AVP device.The AVP is an 'auto draw' device,which mean you just switched on it and you not need press any bottons to use.Then you just inhale and the device will fire.Expecially,the AVP can accept variable wattage adjustment,which allowing you the user to adjust the power output of the device.

Kit Dimensions:

Kits Contains:

✔1*AVP battery unit
✔2*AVP pods
✔1*Micro USB cable
✔1*Lanyard
✔1*Warranty Card
✔1*User manual

If you like it and want to buy it,please visit Cloumix.com. Or if you want to get some discount and learn other interesting products,please also visit Cloumix.com.


Good choice during the trip!The Latest Portable Aspire Slym Kit

Suitable for travel and indoors, the Aspire's latest Aspire Slym Kit has its own unique style with its small size and low-profile, and it attracts a lot of people's attention.

It has silver, rose gold, black, these three fashionable and popular colors.

Let's look at the kit dimensions.

lenghth(mm): 108

Diameter(mm): 20

Output wattage:Bypass

output voltage9(V):3.0-4.2

Built-in battery capacity(mAh): 1000


So the Aspire Slym Kit is lightweight and portable, therefore it can be easily put into your pocket without feeling heavy.

Even with such a small kit, the aspire is serious about putting the protection measures in place.
Aspire gives Slym all the useful protection features.Automatic cutoff,Short circuit protection,Low voltage protection,Overcharge protection,Over heat protection.

So don't worry if people bring Aspire to happen on the road, just enjoy the Aspire Slym Kit to bring you happiness.


Aspire Nautilus 2 Tank TPD Edition Includes? What Will You Get from It

Aspire has always been a popular e-cigarette brand with the great user experience. So for Aspire, its fame is its Nautilus Tank. So now that we have arrived at Nautilus 2 Tank, what new things will Aspire bring? let us see

What will you get from Aspire Nautilus 2 Tank TPD Edition


The Nautilus 2 Tank TPD Edition can store 2ml e-juice, which is TPD compliant and means that European fans can also buy it. Equipped with a convenient top filling system, you can add e-juice directly without removing the atomizer.


Of course, as an MTL Vape, the most important thing is the airflow control system and Drip tip! The improved bottom airflow control system only needs to rotate the airflow ring to easily control the vaping effect we want. Equipped with two different coils, we can get both MTL Vaping and massive vapor. If you like this product too, let's take a look at What’s in the Nautilus 2 Tank TPD Edition Package:

1 x Aspire Nautilus 2 Tank TPD Edition (Pre-installed a 0.7ohm coil)

1 x Extra Coil (1.8ohm)

1 x Extra Glass Tube

8 x Orings

1 x User Manual (please read the instructions carefully before use to ensure a better experience)

1 x Warning Card

1 x Extra Drip Tip


2018 Best Flexible Vape | Aspire Puxos Vape Kit

2018 is an extraordinary year for the electronic cigarette industry. Many electronic cigarette manufacturers have introduced their own unique electronic cigarette products. IJOY launched a UI Vape Kit, followed by SMOK also launched its own I-priv Kit. What surprises will the Aspire Puxos Vape Kit bring us?

A highly playable product

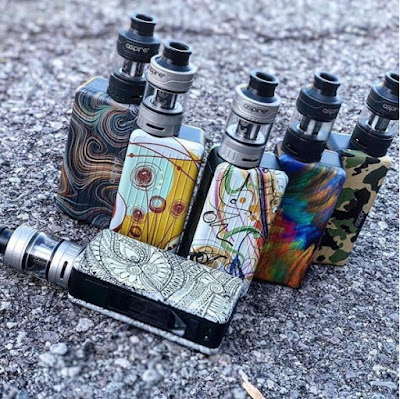
What is Aspire Puxos Vape Kit? This is an ultra-flexible product from Aspire. If you are a car-loving friend, then this product is like the Toyota AE86. It's all waiting for you to change, super playability. Of course, I mean not only the portability it brings, but also its strong adaptability. 124mm height, 48mm width, 30mm thickness, this is the size of the Puxos Vape Kit. A battery compartment that can accommodate one battery is hidden under its compact size. This is also a highlight of this machine. This battery compartment can accommodate a single 21700 battery, or 20700 battery. Of course, we can also find a battery shelve in the package, which makes us very good use of 18650 battery. This design is really good.

Aspire Puxos Vape Kit 18650/20700/21700


However, there may be some differences. The 18650 battery can only achieve a maximum output of 80W, while the 21700/20700 battery can reach a maximum output of 100W. Of course, these can all be chosen by us. After all, this is the advantage of this design. If you think I have finished the advantages of this product, then you are wrong. The upgraded version of the Cleito Pro atomizer not only has a better structure, but also shares the Cleito and Cleito Exo tank's coil. This means you can continue to get the vaping effect you want if you are a vaper like Cleito.

Aspire Puxos Vape Kit Cleito pro tank


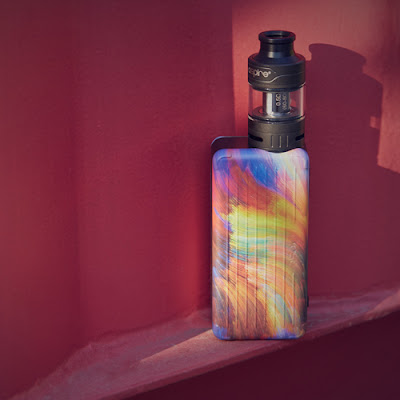
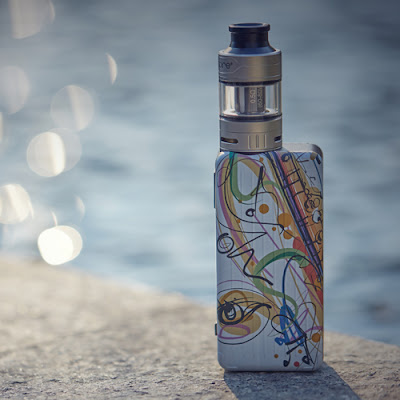
Magnetic covers bring more options to this machine, Aspire offers up to 14 different styles of battery covers to choose from. what do you think? Of course it also has an OLED display on the side of the device, which will work well with our output adjustments. Aspire has always been an e-cigarette brand that focuses on the taste experience. Even though many products introduce various brilliant LED designs, it always insists that the taste is the most important requirement for e-cigarettes. All, it also has a large number of loyal customers. If you are a taste chaser or want to try vaping friends. Aspire Puxos Vape Kit will not disappoint you.

2018 The best flexible vape Aspire Puxos Vape Kit


What Makes the Aspire Zelos 50W Mod So Exciting

If you are looking for a vape mod that will give you a unique experience, I think today's article will help you. Today I would like to introduce Zelos 50W Mod from Aspire. So what's special about it? Let's take a look.


 How is the performance of Zelos 50W mod?

The Zelos 50W mod is an ergonomically designed product, so there is no doubt that it will give you an extraordinary feel. And it offers three different colors for you to choose, I think any one can bring out your temperament. Zelos's size is very small, so it also gives you better portability. So the most important thing is that in such a compact volume, it even comes with a large capacity Lipo battery of 2500mah. With this battery, it can reach a maximum output of 50W. Not only that, it also comes with two adjustment buttons that allow you to freely adjust the voltage and output. 
In addition, these two adjustment buttons have many functions. The specific operation can be seen in the user manual. Zelos 50W mod also comes with a display, although the area is small, but important information you can see. What I have to say is that it also supports VV, VW, Bypass and TC modes to switch freely to meet your different vaping requirements. Yes, Zelos also supports USB charging, allowing you to have a quick charging experience.

So will such a versatile Aspire Zelos 50W make you excited?

Aspire K4 Kit Would Be A Good Choice If You Want To Try Vaping


If a friend who wants to try vaping asks me how to choose a device, no doubt I think I will recommend it to him for a pen style starter kit. Then it is the K4 Quick Start Kit from Aspire.


How is the performance of K4 Kit


For consumers who want to try vaping, the biggest concern is the fear that they are not used to vaping. So the best way to deal with this problem is to start with pen style's vape kit. First of all, K4 is similar to traditional cigarettes in terms of styling, so it will not feel uncomfortable when used. And it's really small, so you can take it anywhere you want. Compared to before, you need to get a box of cigarettes, but now you only need to take a pen. K4 kit consists of K4 battery and K4 Tank. The overall design is very small. The Aspire also offers two different colors, you can choose your own favorite one.


 The K4 battery is powered by a 2000mah built-in battery, which protects you for long periods of vaping. Of course, it comes with a USB charging interface that makes charging easier. It is equipped with a 510 thread interface, which means it supports replacing 510 thread Tank.
K4 Tank has 3.5ml of smoke oil storage space, allowing you to reduce the number of times to add smoke oil. Most importantly, with Cleito Coils, it will give you an extraordinary direct to lung experience.


I think the Aspire K4 Quick Start Kit will be a good choice for you who want to try vaping. What do you think?

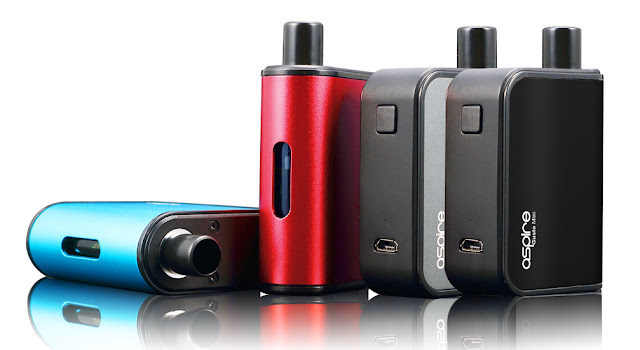
Aspire Gusto Mini All-in-one Starter Kit User’s Guide


Instructions

  • Press the fire button 5 times rapidly to power the Gusto Mini On or Off, the indicator light will then flash both green and red 3 times to indicate on or off.
  • Continuous fire time is 10 seconds; after 10 seconds of firing the indicator light will flash green or red 10 times to Indicate Shut Off. Notice the LED color; it also indicates current Charge Level. (Green = Charged / Red = Battery Low)
  • When the charge level is above 3.5V the indicator light will be green, if charge level drops below 3.5V, the light will be red.
  • When Red light flashes during use, it’s time to recharge.

Charging Gusto Mini
  • Charging is via Micro-USB charging port. Maximum charging current can reach up to 900mA.
  • Connect the Gusto Mini to your charger (USB cable included), the indicator light will flash green and red 3 times, then turn red to indicate charging. When the charge reaches 4.2V the light will turn green to show it’s fully charged.
Liquid POD Activation and Installation
1. To Activate POD, grab the two silicon tabs and gently pull down away from the
POD until the the two tabs snap off-the tank is now activated.
2. Take the POD and flick once or twice in a downward motion to speed up the
saturation to the atomizer. Once the bottom chamber is filled with liquid, let set for 2 minutes before use.

Installing POD to Device:
1. To access the POD chamber, slide the cover off of the device.
2. Gently slide the POD into the capture points, making sure the atomizer is on the bottom. Push in until the POD is securely in place. Slide the aluminum cover back on and the Gusto Mini is ready to use.
3. After installation, and the device is ready to use, fire the device with a few quick puffs to make sure the atomizer has been saturated with liquid. Once you get a taste of the liquid vapor,continue to use as normal, enjoying the full flavor of the Gusto Mini—Enjoy!

Aspire Skystar Revvo -- New Vape and New Technology

Recently, the Aspire Skystar Revvo Kit was released. The fashionable touch screen, innovate and traditional ARC coil and top refill system bring us extraordinary vaping experience. The kit is an ambitious design which is packed with an array of features. There are five colors for you to choose from: White, Woodgrain Effect, Blue Camo, Slate Blue and Black Carbon Fiber.


The shape of Revvo Tank is slightly different from other atomizers. There is a resin ring similar to the cigarette holder in the middle. The upper part of the resin ring is the airflow adjusting ring, and the upper part is the drip cap. The lower part is glass fittings and you can see the metal columns in the tank.

The Revvo Tank no longer adopts the traditional technology such as U-tech, BVC, replacing Aspire created ARC. ARC is the abbreviation of Aspire Radial Coil that is made up of cotton, which revolutionized the development of vape. The coil is great for vapor production and outstanding flavor. The atomizer comes in a 3.6ml Standard Edition and a 2ml EU Edition. It features an adjustable top airflow and top fill for easy to use.

The sensuous curves of the mod make it pretty ergonomic in the hand and easy to carry. Powered by 18650 cells, Skystar fires a maximum output of 210W. It features a 1.3 inch touch screen, making the operation easier than ever. The Skystar supports CPS (Customizable Power Settings) and Wattage/Voltage/BYPASS/TC (Ni, Ti, SS, M1, M2, M3) modes.

This vape is attractive, with smooth curves and various colors to fit every style. Finally, what are you thoughts on the design and new ARC coils? Can you tell me?

How To Use Aspire SkyStar Revvo Kit Correctly


Top fill instructions 
Filling this tank is super easy and convenient, the filling hole is inside the tank, which can be reached by using a gorilla bottle or just as simply by a glass dropper. 
1. Locate your filling bottle/dropper onto the spring loaded filling tube and press it down (only minimal pressure is required). 
2. Squeeze the filling bottle/dropper to fill the tank.

Note: 
1. After filling, release pressure on the filling tube to allow it to seal, then release pressure on bottle before removing completely, this will draw off any excess e-liquid and avoid spillage directly onto the coil. 
2. Due to the special design of the tank, after the first filling and when replacing the coil, you should turn the tank upside down for 2 minutes to help saturate the coil with e-liquid.

Coil installation 
1. Unscrew and remove the top chamber. 
2. Unscrew and remove the mounting screw. 
3. Remove the used ARC coil by lifting over the filling tube. 
4. Place a new coil over the filling tube; make sure the coil edge is lined up with the tank, and sits securely. 
5. Screw the mounting screw back onto the base hardware. 
6. Replace the top chamber.

Replacing glass 
1. Unscrew and remove the glass securing ring from the base hardware. 
2. Pull and remove the used glass tube. 
3. Insert a new glass tube. 
4. Screw the glass securing ring back onto the base hardware firmly, but do not over-tighten. 

Protective cap 
1. It is recommended to close the airflow slots and to use the provided protective cap when travelling or when the tank is not in use to avoid leakage and prevent dust and dirt from entering the top chamber. 
2. It is also advisable to use the protective cap when carrying onto a plane as the cabin pressure can adversely affect the pressure inside the tank.  

Precautions: 
  • Do not press the fire button without the top cap in place to avoid potential spitting and hot e-liquid hitting your skin. 
  • Do not press the fire button when not vaping, this may cause excess unvaporized e-liquid to build up inside top chamber which could be unpleasant. 
  • While vaping, periodically invert the tank to ensure that the coil doesn’t dry out, running the risk of burning the coil.
Fire button functions 
1. Click the fire button 5 times quickly to lock or unlock the mod, when the mod is locked the screen will display “Locked Click 5X”. 
2. Pressing the fire button for 2 seconds in locked mode will turn the system off, to turn it back on, press the fire button 5 times rapidly. 
3. Clicking the fire button 3 times rapidly will turn the mod into stealth mode, while in stealth mode the screen will remain off, but the fire button still works. 
4. Pressing fire button under different modes will confirm your settings.

Touch Screen instructions   
While the mod is on, swipe down the screen twice will take the mod into its menu interface, where you can adjust the settings to your liking.

1. Touch MODES to allow you to select the output modes from Wattage/Voltage/BYPASS/TC and CPS (Customizable Power Settings). When the mod is in Wattage/Voltage/TC(Ni/Ti/SS /M1/M2/M3)/CPS modes, swipe up the screen twice to allow adjustment of the values, in TC mode you can also lock/ unlock the resistance by touching the lock symbol. Swipe right will return to the previous page. Press the fire button to confirm the settings, once confirmed you will return to the working interface.

While the resistance is unlocked, in TC mode attaching a new atomizer the mod will read “New Atomizer?” followed by “YES+/NO-” Select “YES+” and the mod will read the original coil resistance. Select “NO-” and the mod will keep its previous coil resistance settings. (Note: To ensure accuracy, when first installing a new atomizer make sure the screen is lit   and the coil attached is at room temperature before attaching it to the mod.) 

To change temperature to Fahrenheit(F) or to Celsius(C), touch the “+”or “-” button all the way to pass the temperature range, the temperature will switch over to either Celsius or Fahrenheit automatically. 

2. DATA setting on the SkyStar mod is a shortcut to adjust the Wattage preheat (Wattage ramp up)/TCR and CPS settings. Wattage preheat lasts for 1 second, it has three levels: HARD/NOR/SOFT.   

Selecting TCR allows you to customize the TCR values and power settings under M1, M2, M3 while in Ti, Ni, Ss only the power value can be adjusted. Swipe right, will return to the previous page, touch the “+” or “-” symbol to change the values, press the fire button to confirm your settings. (Power range (5-210W) TCR value is from 0.2‰ to 9.99‰.)   

Selecting CPS(C1,C2,C3) will allow you to fine-tune your heat ramp-up in the first 9.5 seconds. Touch the arrow symbol to select time from 0 to 9.5 seconds, touch “+” or “-” symbol to change the wattage. Press fire button to confirm.

3. Touch SYSTEM to adjust the Vape time (5-15s), Screen time (5-120s), Watch time (5 seconds-30 Minutes), screen brightness, and language, you can also return to the default settings.

4.Touch TIME to allow you to adjust the time according to your region, the time can be displayed in the form of digital or analogue clock. Touch “YYYY-MM-DD” to adjust the date format. Touch the time area to select date/month/year/hour/ minute/second. Touching “+” or “-” to change the number, Press fire button to confirm.

5. When the time display is activated (Select digital/analogue to activate, select OFF to turn off the time display), tapping the screen three times quickly will turn the mod into time display, to turn it back to the working interface, tap the screen three times again. 

6. Touch ABOUT to check details of product name and firmware version, scanning the Q&R code will take you to Aspire’s official webpage, where you can check more details about the device you purchased. 

Battery installation 
1. Lift off the magnetic battery cover on the rear of the mod using the thumb nail slot to open the battery cover. 

2. Insert two 18650 batteries into the battery compartment, be aware of the orientation of the positive and negative   connections. 
Note: ensure that the fabric battery tab is underneath both batteries to assist with easy removal. 

3. Place the battery cover back onto the mod. 
  
Charging 
1. Charging the mod via Micro-USB charging port, the charging current can reach up to 2A. 
2. Connecting the mod to the charger, the screen will display 2 growing battery icons, it also shows the battery percentage, charge time and charge current. 
3. Once the battery level reaches 4.2V or when it’s fully charged, the mod will stop charging the screen will shut off.
4. The mod will not charge when the batteries are incorrectly installed or when there’s only one battery installed. 
5. The batteries cannot be replaced while charging, please unplug the charging cable before changing the batteries. 
6. Check charger alert: When the mod detects the USB charge voltage is above 5.3V or is less than 4.3V, it will stop charging and the screen will display “CHECK CHARGER”. 
7. To accomplish 2A charge current, the adaptor output should be 5V/2A.

Firmware update 
  • Download the driver software and firmware file from Aspire website: http://www.aspirecig.com/upgrade/
  • Connect the SkyStar to your PC. The driver will detect your mod automatically. 
  • Click “OpenFile” to choose the correct firmware file. 
  • Click “Update” to upgrade your mod. 
  • If it failed during the update process please repeat step 3 to step 4. 
Precautions: 
  • Please use high quality, high drain batteries from a reputable battery company. Ensure they are matched in terms of voltage, mAh and total amps. 
  • We recommend using only the supplied USB cable to charge or update the firmware of your mod.